
Some time ago, I was following a thread in an online photography forum, and there were two thread participants who obviously disagreed on post-processing philosophy. The individual who favored little or no post-processing commented, “I don’t want to edit my photos. I want them to look like what I saw.” While tastes obviously vary on how to edit images, one thing is for sure. Your camera sensor is NOT seeing what your eyes see.
When making a photograph, we are taking a three dimensional view and flattening it to two dimensions while we dramatically reduce the dynamic range and remove everything but a rectangular portion of the view. If the view is a sunset, for example, the camera sensor will blow out the bright portions and still leave the shadowed areas as black. That’s not what we saw. Our eyes are much more capable than that. Don’t believe me? Take your camera outside at night when there’s a full moon and some light clouds. Take in the view. Look at the details in the clouds. Then take a picture and see what you captured. You’ll likely see a blown out light from the moon, with almost all else black. If we want our camera to come close to preserving our actual views, we must understand the technological limitations and how to overcome them.
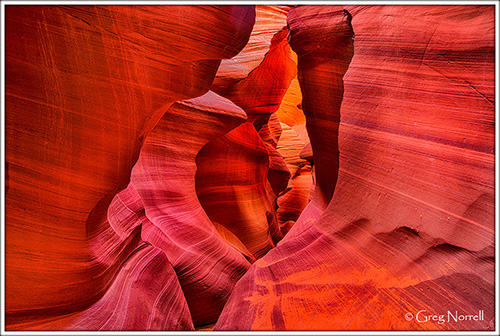
Since I used as one example a sunset above, let’s first delve into the issue of dynamic range. For many landscape scenes without the sun directly in the frame, modern camera sensors have the dynamic range to adequately capture the scene. A quick glance at a histogram for an image will allow you to discern if the chosen scene is adequately captured by your camera. If it is not, then High Dynamic Range (HDR) techniques are necessary if you want to produce an image that is similar to what you actually saw. Note that HDR does not have to be the highly processed grungy images that some make. While there is nothing wrong with such images, it is equally acceptable to use HDR techniques to simply better represent a particular landscape scene. In such cases, the photographer is basically adding the values (0-255) for each color (RGB) in each pixel for the number or bracketed images and then dividing by that same number. The result is values less than 255 and more than 0 for each color in each pixel. The example below is from Lower Antelope Canyon in northern Arizona. It was produced from a bracketed sequence of three images, which was sufficient to compress the dynamic range into something showing the details visible to the human eye. When looking up and including the sky above the camera in the frame, the number or images in the bracketed sequence needed to be increased to five and sometimes seven shots.
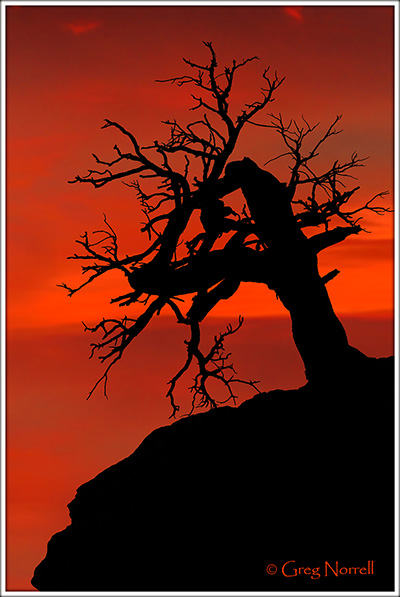
As a final note regarding dynamic range limitations of camera sensors, it should be mentioned that sometimes one might wish to intentionally capitalize on the reduced dynamic range. Consider the tree silhouette below as an example. My eyes could see some detail in the foreground and the tree. But in this case I liked the effect produced my the reduced dynamic range of a camera sensor.
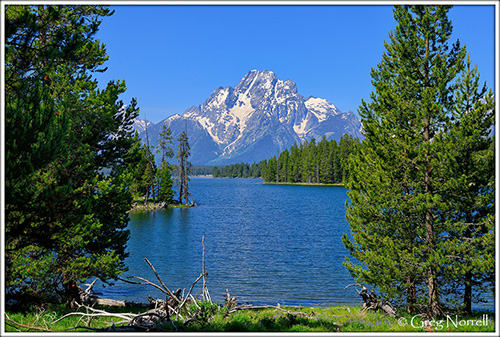
Next, let’s consider dimensions. Again, a photograph is a two dimensional representation of a three dimensional view. The photographer decides how to provide some perspective on the depth of field. The example below uses trees framing the edges of the shot, along with some branches at the bottom. The water then separates the foreground trees from trees in the distance and produces the illusion of depth. Finally the mountain in the distance adds to the perspective. For such an image, using an aperture of f/8 will allow basically everything in the scene to be adequately sharp. By using an online depth of field calculator, we can see that at 24mm and f/8, everything from about four and a half feet to infinity from the camera lens is adequately focused for this camera (Nikon D800E). Note that some cameras would have to be stopped down a bit more to keep the distant portions in focus. For example, an entry level Nikon such as the D3000 would need to use an aperture of f/11 to keep everything adequately sharp.
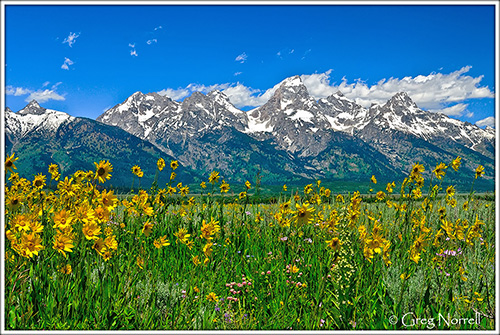
For another example, consider this image of wildflowers in front of the Tetons. The near component of the wildflowers contrasted with the towering peaks in the distance provides a sense of depth. Often times for images such as this one, I will use focus stacking. While the camera is on a tripod, I will take one shot using a focus point on the flowers and then one identical shot after moving the focus point to the mountains. Using an aperture of f/11 may adequately keep the whole scene in focus, but if not, I stack a couple of images at f/8 and combine them in Photoshop. This image also illustrates the importance of camera height in setting up your shot. In this case, I have the camera on a tripod close to the ground at the level of the flowers. At such a position, the meadow between the flowers and the mountains is diminished, leaving the contrast of near and far. In some cases it is often advantageous to increase camera height to maximize the depth of the foreground. I will often set up in the bed of my truck or use a ladder to set up that view. Conversely, when one has a rather boring foreground, move the camera closer to the ground and the two dimensional space allotted to the foreground is reduced.
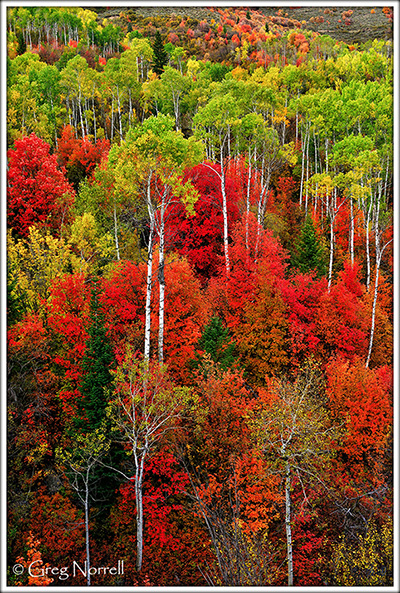
As another example, consider this image of autumn in Idaho. Rather than trying to create the illusion of depth for this two dimensional view, I did the opposite. The hillside with these beautiful trees sloped consistently upwards. Collapsing that third dimension basically allowed to produce an image that appears as a ‘wall’ of autumn splendor.
Finally consider the framing. You are seeing a much wider perspective than you’ll likely see through your viewfinder. You have to decide how to use that in your images. I commonly set up a foreground element near the camera on one or both sides of the image, as done in the lake example above. In this regard, you simply have to find your own style and what works for you.
In conclusion, there is obviously a big difference in what a camera sensor captures compared to what your human eyes saw. Experience will help understand the differences so that each photographer can use those differences to produce their own art. Note that I did not intend to imply that photographers ‘need’ to accurately capture a scene representative of the actual view. Use your imagination along with the technology to create your own vision of art.